
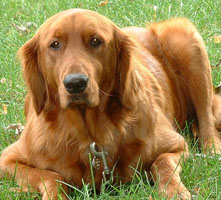
Golden Retriever
Grooming Your Golden Retriever
Regular grooming has many residual benefits, some of which are a cleaner home, less dirt and dog hair and a happier, healthier dog. Daily brushing and weekly nail trims are some of the things to begin with. Dogs being shown and puppies being trained for shows are bathed and trimmed on a weekly basis. Companion dogs are bathed every ten days to two weeks. Since our dogs all come into the house on a regular basis, the frequent bathing and brush/blowing on a regular basis helps keep the house clean and also eliminates that “doggy” odour. I suggest you complete the grooming process in two separate sessions. You may choose to bathe and trim in one session, but with young dogs this may not be ideal as it requires them to remain too long a time on the grooming table. I suggest you bathe one day and do the trimming the next. You should bathe your dog before trimming because it is easier to trim clean hair and you will not damage your scissors with dirt. If you are grooming your dog regularly, i.e., blowing out or brushing the coat every other day and keeping the dog clean between baths, you may wish to just trim the dog every ten days or so to keep it looking neat.
1. Thoroughly brush out your dog’s coat. Remove any tangles or foreign matter at this time. Prepare to bathe your dog by placing cotton in his ears and a drop of mineral oil in his eyes. Dogs prefer to be bathed in warm water, neither too hot nor too cold. The basic rule of thumb is: if the water is comfortable to you it is the correct temperature for the dog.
2. Thoroughly rinse your dog with warm water, beginning at the neck (not the head). Finish by rinsing the head being careful to avoid eyes and holding the ears closed. To do this, gently squeeze the base of the ear with one hand while rinsing with the other. After the dog is thoroughly wet, apply shampoo beginning at the neck and working back towards the tail. Be sure to apply shampoo to the legs, under the belly and under the buttocks. Next, work the shampoo up around the dog’s head and ears, avoiding the actual face/eye area. The reason you begin at the neck is so as to minimise shaking-off. Dogs shake water or other fluids off when their heads become wet.
3. Work the shampoo into a lather and gently massage your dog’s entire body. For a lovely massage, work your fingers gently down his backbone and ever so gently to the end of his tail. You can actually feel your dog relax.
4. Rinse, rinse and rinse again. I generally rinse until I believe all the soap is out and then give the dog one more rinse just for “good measure”. Towel-dry the dog, beginning at his head and working towards the back. Dry the legs and feet thoroughly then let him shake himself off several times. Put the leash on your dog. If you are bathing him indoors in the bathroom, you might then want to take him into the kitchen, hence the leash.
5. Clean his ears with an ear cleaner/dryer such as Oticlens or R-7 Ear Cleaner.
6. Blow him dry with a dryer. If the weather is warm, he can dry outside his kennel run.
7. When the dog is dry, thoroughly brush his coat and run the Greyhound comb through his furnishings (the long hair on legs, underbelly and behind the buttocks).
TRIMMING THE FEET
1. Using small 6 ½” straight scissors, trim the excess hair away from the pads (the bottom of the feet). Do not trim the hair between the toes, this will be trimmed later using the thinning shears. Next, trim around the outside edge of the foot, following the natural line of the foot. This is the area where the hair on the foot meets the side of the black pad.
2. Take your small slicker brush and brush the hair on the foot up, in the opposite direction of growth. As you do this you will see long tufts of hair coming out from between the dogs toes. Holding the shears with the point up, trim the tufts so they are even with the hair on top of the foot. Brush the hair down and make final adjustments to the perfect “cat’s foot” with the straight scissors.
3. Finally, trim your dog’s toenails with a good quality nail clipper and finish off with a nail grinder.
GROOMING THE EARS
1. To groom the hair on and around the ears, brush the hair on the outside of the ear upwards, again in the opposite direction of growth. Using your thinning shears, begin just below the top of the ear and on the inner side from the front flap, (that small piece at the very front of the ear that turns black). Place the shear tip pointing up, under the hair and move in small increments from left to right giving just a snip or two as you move from the top to the bottom of the ear. After every three or four snips, comb the hair down and look at the results. You should not see any scissor marks.
2. To trim the excess hair from the front flap, point the tip down. This is the only time the tip will be pointed down when trimming ears. This allows you to trim with the grain of the hair. Snip the hair once or twice and brush out. Once it is neat, stop trimming.
3. Next, you will trim the outside edge of the ear. Still using the thinning shears, begin at the bottom (longest point) of the ear and trim along the outside edge, moving the shear toward the back of the dog’s head. Go back to the longest point and square off the bottom of the ear in a straight line. Then, gently round the edge of the straight line. This allows you to follow the contour of the ear and presents a soft appearance. Now trim the short area between the bottom of the ear and the flap. Begin just above the bottom of the ear (the portion you have just worked on). Pointing the tip of the shears up follow the edge of the ear up to the bottom of the flap. A word of caution, in this area you only need to trim a small amount. Remember, you have already trimmed the flap portion with the shear pointing down.
4. To complete the job with thinning shears: turn the ear over and trim off the hair on the inside of the ear. Finally, trim along the entire inner and outer edge of the ear by following the edge and working from the bottom of the ear towards the head and from the bottom of the ear towards the neck.
TRIMMING YOUR DOG’S NAILS
Clipping your dog’s nails can be a challenge. There is an answer - it helps to have someone else hold him, with the right amount of gentle resistance (up to 3 months of age, while you trim. The goal is to make trimming a routine, non-threatening experience. Take your time and speak softly to the puppy.
Most people fear trimming nails because they don’t want to hurt the dog. Trimming a dog’s nails is just like trimming your own. It doesn’t hurt unless you get too close. A dog usually protests more from having its foot and toes held than from the actual trimming itself.
As puppies become older, they also wiggle and protest a bit more. If you are persistent and trim weekly, they soon become used to it and sit or stand quietly.
Nail Clippers
For puppies 3 months and under, use a regular “human” nail clipper. Not the large toenail clipper, just a regular sized clipper will do.
When the puppy is 4 months and up, you have a choice of several different types of clippers or a grinder, but I personally like to use the grinder and will get the puppy used to it. The grinder is sometimes more annoying to the puppy, but less likely to cut to the “quick”.
I use clippers on young puppies and switch to a grinder at about 5 months of age.
If you want to continue to use a nail clipper, purchase a high quality clipper with an adjustable piece between the blades. This allows you to adjust for the amount of nail you want to trim back and is added protection against taking too much nail off and cutting the dog’s “quick”.
In addition to the clipper or grinder, purchase a vial of Kwik–Stop styptic powder. This can be found at any pet supply store.
USING THE CANINE BLOW DRYER
The key to successfully blow-drying a Golden’s coat is to follow a pattern. Hold the nozzle of the dryer hose in the proper direction and dry the coat in two stages. First dry 95% of the coat blowing against the natural growth of the hair and secondly, finish drying by blowing the coat in the natural direction of its growth.
1. DRYING THE REAR END
Facing the dog’s buttocks, hold the nozzle approximately 12 inches away. This allows the hair on the back of the legs and buttocks to spread and run all the way to the skin. While holding the nozzle in one hand, use your pin brush to gently brush through the hair as it dries. This procedure will remove any snarls or areas where the hair is “clumping” together. Dry the back legs and furnishings, including the tail. Dry the tail underneath and on top. When drying the top of the tail, hold the nozzle in the direction of hair growth. Make sure tail is totally dry. Putting dogs away with a wet tail can cause a “cold tail” which is painful, takes several days to return to normal and, according to Murphy’s Law, “always occurs before a big show”.
2. DRYING THE REAR LEGS
Hold the nozzle very close to the foot and blow against the grain of the hair. You may use your slicker brush in this area. Stay close with the nozzle until you get into the hip area. When you reach the hip area, hold the nozzle 8 to 12 inches away and continue to blow against the grain. Continue working up each hip to the top of the back over the tailbone. Use the pin brush while grooming this area.
3. DRYING THE BODY
Back: Holding the nozzle 12 inches away and pointing directly down onto the back, work in sections or rows. Begin at the centre of the spine over the buttocks and work from rear to front at the withers. By working in rows, you can see the hair dry to the skin and it helps you maintain the pattern. Note: Because the dogs can’t see what you are doing and the dryer is noisy, they often become apprehensive. I find that gently holding an ear closed while working on the back and upper side makes for a happier dog, i.e. right side of back, hold the right ear.
Sides: Dry along the back from the centre of the spine and move down one side from centre spine to the middle of the rib cage, When you are at mid-rib cage, move the nozzle under the belly and dry the underside of the dog working back up the area along the rib cage that is already dry. Repeat this procedure on the other side of the dog.
Belly: Working from back to front, thoroughly dry belly hair pointing dryer nozzle up directly under the belly. Lift each front leg and dry under elbows and underside of chest. Continue up into the chest area, moving dryer nozzle further away from the dog and holding the ear on the side you are drying. If the dog is sensitive, turn dryer to lowest setting at this point.
4. DRYING THE FRONT LEGS
Dry the front legs holding the nozzle close to the hair, pointing up against the natural growth of the hair. You may use a slicker brush (on the front of the leg only) to aid in drying. Some dogs and puppies are sensitive to the brush in this area; if so, go slowly and use the brush sparingly. You can achieve the desired result by pointing the nozzle of the dryer upward. For the long hair (feathering) at the back of the front legs, hold the nozzle in the centre so the hair spreads out - use a pin brush to remove tangles.
5. DRYING THE HEAD
Turn your dryer to the lowest setting; you will be working with the nozzle much closer in the front, between a 1- to 6-inch distance. Be very cautious about allowing the forced air to go into the ear. I make it a practice to always hold an ear closed, sometimes stroking the ear when I work on the front of a dog. Quite often on young puppies or dogs that are not entirely comfortable with the drying process, I leave the head slightly damp. In other words, don’t make a big deal of getting the head dry. It’s more important to let a dog become adjusted to the whole process rather than attempting to get it perfect the first time.
6. A FINISHED LOOK
Blow the hair in the direction it grows. Hold the nozzle approximately 6 inches away from the dog. Begin at the top of the head and work back towards the tail, drying and brushing the coat with a natural bristle brush or pin brush in the direction of hair growth. At this point, you are smoothing the hair down and taking out as much curl (if any) as possible.
Complete the job thoroughly by combing through the dog’s coat with a Greyhound comb.
Grooming Products
Ultimate Soft Slicker Brush (medium and triangular for hocks)
Ultimate Pin Brush (Large)
Ultimate Metal Comb (Greyhound type)
Shampoos and Conditioners
#1 All Systems Super Cleaning and Conditioning Shampoo (especially for maintenance)
#1 All Systems Crisp Coat Botanical Texturizing & Detoxifying Shampoo (especially for show days)
#1 All Systems Professional Formula Whitening/Brightening Shampoo
#1 All Systems Super Rich Protein Lotion Conditioner
#1 All Systems Self-Rinse Shampoo: Self-Rinse Conditioning Shampoo & Coat Refresher (especially during winter months)
#1 All Systems Product Stabilizer Coat Re-Texturizer and Skin Stabilizer
#1 All Systems 3-D Volumizing Spray
#1 All Systems Moisturizing Coat Protector
#1 All Systems Premium Protein Pack & Pre-Chalk
#1 All Systems Color Enhancing Botanical Conditioner (natural plant-based color enhancing product)
#1 All Systems Ear So Fresh
#1 All Systems Vital Energy “Super-Food” Supplement
#1 All Systems Tea Tree Oil Spray (anti bacterial, anti fungal, antiseptic, analgesic)
ASIA PACIFIC PET SUPPLY
3018 Bedok North Street 5 #01-22 Eastlink Singapore 486132